You just got back from a shoot with 340 photos. Or you're prepping product images for an ecommerce store with 120 SKUs. Or you've inherited a folder of 600 client photos that all need to fit a specific size for the website.
Resizing them one by one would take half a day. And by image number 50 you'd be hating your life.
Bulk image resizing exists to fix exactly this. Upload a folder, set the rules once, walk away. Come back to 340 perfectly resized photos in the time it takes to make coffee.
This guide walks you through how batch resizing actually works, when to use it (and when not to), the exact settings that protect quality across hundreds of images and the common mistakes that turn a 5-minute job into a 5-hour mess.
What bulk image resizing actually does
Bulk resizing means applying the same resize rules to multiple images at once. You set the target dimensions, file format and quality once, then the tool processes every image in the batch with those exact settings.
The output is consistent. Image 1 and image 340 come out with the same dimensions, the same format and the same quality. That consistency is the whole point. It's why ecommerce stores, photographers, bloggers and marketing teams use bulk tools instead of resizing manually.
Three common batch scenarios:
- Resize 200 product photos to 1200x1200 for a Shopify store
- Convert and compress 500 wedding photos for client delivery
- Prep 50 blog images at 1600px wide before publishing
In every case the goal is the same: identical processing rules applied to every file without manual repetition.
How bulk resizing works (visual breakdown)
The mental model matters. Here's what's actually happening when you batch process images.
Three stages. You feed in a pile of unsorted images. The tool applies your single rule set to each one. You get back a clean, uniform set of resized images. The work is in setting the rules. Everything after that is automatic.
When bulk resizing actually saves you time
Batch processing is powerful, but it's not the right tool for every job. Here's when it earns its place and when it doesn't.
Use bulk when:
- You have 10+ images that all need the same treatment
- The images are roughly similar (all photos, all screenshots, all product shots) so one quality setting works for everything
- You're prepping content for a single destination (website, store, social feed) where consistency matters
- You'll repeat this job regularly (weekly product uploads, monthly photoshoot deliverables)
Skip bulk when:
- You're working with under 5 images. The setup time beats the resize time
- Each image needs different settings (one needs to be a 1080x1080 square, another a 1200x630 landscape)
- Some images are photos and some are screenshots. They need different formats and compression
- You need to crop each image individually for composition
If you're working on a single image and want to learn the foundations first, here's the complete guide to resizing an image online. Once you've got the basics down, batch processing is just doing the same thing 100 times at once.
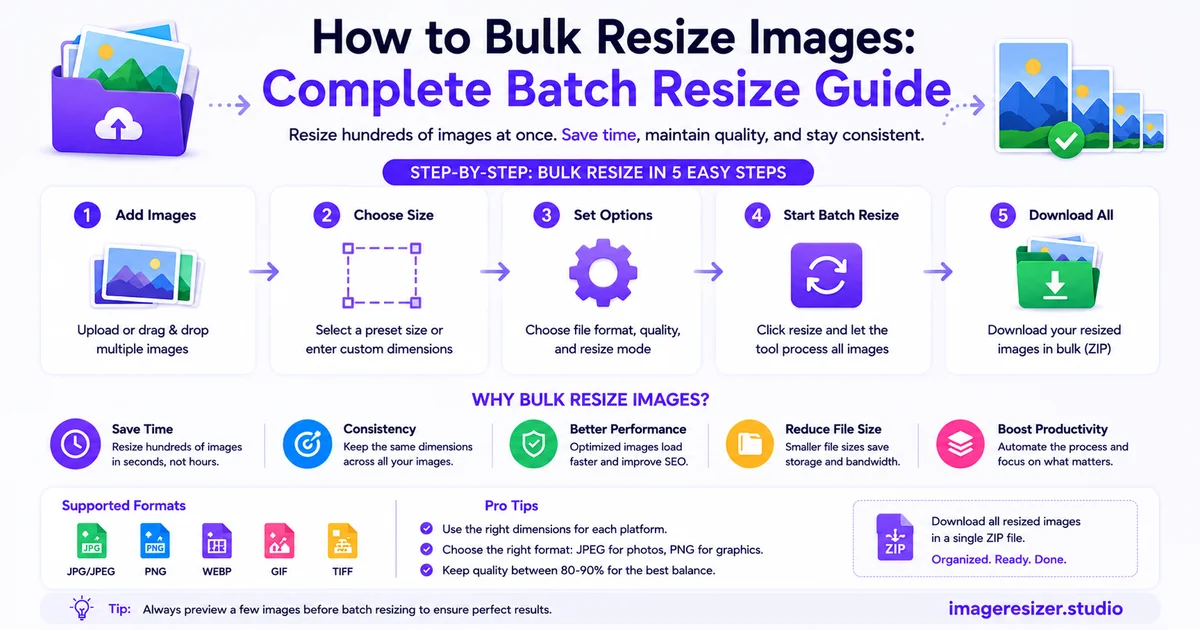
The 5-step bulk resize workflow
This is the process that works whether you're handling 20 images or 2,000.
Step 1: Organize the source folder
Before you upload anything, get the folder in order. Put every image you want to batch process in one folder. Move out anything that needs different settings. The cleaner the input, the cleaner the output.
Rename files if needed. If you're going to need to find specific photos later, name them now ("product_red_shoes_001.jpg" beats "IMG_4837.jpg").
Step 2: Pick your batch tool
Browser-based bulk resizers are the easiest for most people. No software install, no learning curve. Drop a folder in, set rules, download. Desktop tools like XnConvert and IrfanView handle bigger batches (10,000+ images) if you're doing this professionally.
Step 3: Set the rules ONCE
This is where you slow down and get it right. Wrong rules applied to 300 images means 300 wrong outputs. Confirm:
- Target dimensions (width and/or height in pixels)
- Whether aspect ratio is locked (almost always yes)
- Output format (JPEG, PNG, WebP)
- Quality setting (85% is the sweet spot for JPEGs)
- File naming pattern (keep original names or add a suffix like "_resized")
Step 4: Run a test batch first
Don't process all 340 images on the first try. Pick 5 representative ones (one with text, one dark photo, one bright photo, one detailed one, one simple one) and run them through. Open the outputs. Check for problems.
If everything looks right on 5, it'll look right on 340. If something's off, fix the rules now before you've burned through the full batch.
Step 5: Process the full batch and verify
Run the rest. Most browser tools process locally so it's fast. A 340-image batch at 1200px usually finishes in under 2 minutes.
Spot check the output. Open 10 random images from the result. Check edges, text clarity and file sizes. If even one is off, something went wrong in the rule set and you need to re-run.
Want to skip the setup and just drag a folder in? Try the bulk image resizer here →. Drop multiple images, set your rules once, download the whole batch in one go. No signup, no watermark.
The settings that protect quality across hundreds of images
Single-image resizing lets you tweak each one. Bulk processing doesn't. You're committing one set of decisions to every file in the batch, so those decisions need to be right.
Quality setting
For JPEG batches, stay between 82% and 90%. Below 80% you'll see compression artifacts on detailed images (especially photos with sky, water, or skin tones). Above 90% you're making the files bigger without any visible improvement.
85% is the safe default. Works for product photos, lifestyle shots and most general photography.
Format choice
Match the format to the dominant image type in your batch:
- Photos = JPEG
- Screenshots, logos, graphics with text = PNG
- Web-bound and supports WebP = WebP (saves 25-35% file size at same quality)
If your batch has mixed content (photos + screenshots in the same folder), split it into two batches. Forcing screenshots into JPEG turns text fuzzy. Forcing photos into PNG balloons file sizes by 5x.
Resize method
Choose one dimension to lock (usually width) and let the height auto-calculate based on aspect ratio. "Resize to 1200px wide" works on any aspect ratio. "Resize to 1200x800" forces every image into that exact ratio, which means cropping or stretching.
Width-only or height-only resizing is the safest bulk approach when your source images vary in aspect ratio.
JPEG quality settings: the visual sweet spot
Most people guess at quality settings. They shouldn't. Here's what each level actually looks like in practice.
85% is the answer for most batches. Anything below 80% costs you visible quality. Anything above 90% costs you file size with no benefit.
5 mistakes that ruin a bulk resize job
1. Mixing images that need different settings
Throwing product photos and screenshots into the same batch is the fastest way to ruin both. Photos want JPEG at 85%. Screenshots want PNG (lossless). Split your batch by content type before processing.
2. Skipping the test batch
Running 500 images through untested settings means you might be ruining 500 files. Always test on 5 first. The 30 seconds you save by skipping the test isn't worth re-running the whole job.
3. Overwriting originals
Some bulk tools default to writing resized files over the originals. Always set output to a new folder. If something goes wrong with the batch, you can re-run from clean originals.
4. Ignoring aspect ratio variation
If your source folder has a mix of landscape, portrait and square images, locking to exact dimensions (like 1200x1200) will crop or stretch some of them. Use width-only or height-only resizing to keep all the aspect ratios intact.
5. Forgetting to check the output
Bulk tools are fast. So fast that people skip the verification step. Open 10-15 random files from your output folder before deleting the originals or uploading anywhere. One bad rule can corrupt a whole batch silently.
When you've outgrown browser-based bulk tools
Free online bulk resizers handle most jobs comfortably up to a few hundred images. Past that, you'll feel the limits.
If you're regularly processing 1,000+ images at a time, look at desktop tools (XnConvert, IrfanView batch mode, Adobe Bridge). They run faster on large batches and let you save preset configurations so you don't re-enter rules every time.
If you're doing this as part of an automated pipeline (uploading product photos that get auto-resized for the storefront), look at image CDNs like Cloudinary, ImageKit, or Imgix. They resize on the fly when images are requested, which eliminates the batch step entirely.
Most people never need either. A browser bulk resizer covers 95% of real-world use cases.
Frequently Asked Questions
How many images can I resize at once?
Depends on the tool. Browser-based bulk resizers usually handle 50 to 500 images per batch comfortably. Past that you might run into browser memory limits. If you're regularly processing 1,000+ images, a desktop tool will run faster and more reliably.
Will bulk resizing reduce the quality of my images?
Only if your quality settings are wrong. At 85% JPEG quality with a good resampling algorithm, the loss is invisible. The math the tool does on a batch is the same as on a single image. Bulk processing doesn't add extra quality loss by itself.
Can I bulk resize images while keeping different aspect ratios?
Yes. Use width-only or height-only resizing instead of locking to exact dimensions. "Resize all to 1200px wide" keeps each image's original aspect ratio while making them all the same width. Locking to "1200x1200" forces every image into a square, which crops or stretches non-square sources.
What's the best format for bulk resizing photos?
JPEG at 82-90% quality for general use. WebP if your destination supports it (saves 25-35% file size at the same visible quality). Avoid PNG for photos unless you specifically need transparency, because PNG file sizes are 3-5x larger than JPEG for the same photo.
Is it safe to bulk resize sensitive client photos online?
Depends on the tool. The safest ones process images entirely in your browser without uploading them to a server. Image Resizer Studio works this way. Your files never leave your device, which means no privacy risk and no storage of your photos anywhere.
Wrapping up
Bulk resizing is one of those tools that sounds boring until you actually need it. Then it saves you hours every week.
The workflow is simple. Organize the folder. Set the rules once. Run a 5-image test. Process the full batch. Spot check the output. Done.
Once you've done it twice, you'll never resize images one at a time again.