You found a photo that fits the moment, opened it on your laptop, and the file is 8 MB. Your blog won't accept it. WhatsApp compresses it into mush. Your CV upload form says "max 200 KB" and refuses to budge.
Welcome to the most common digital problem nobody warns you about.
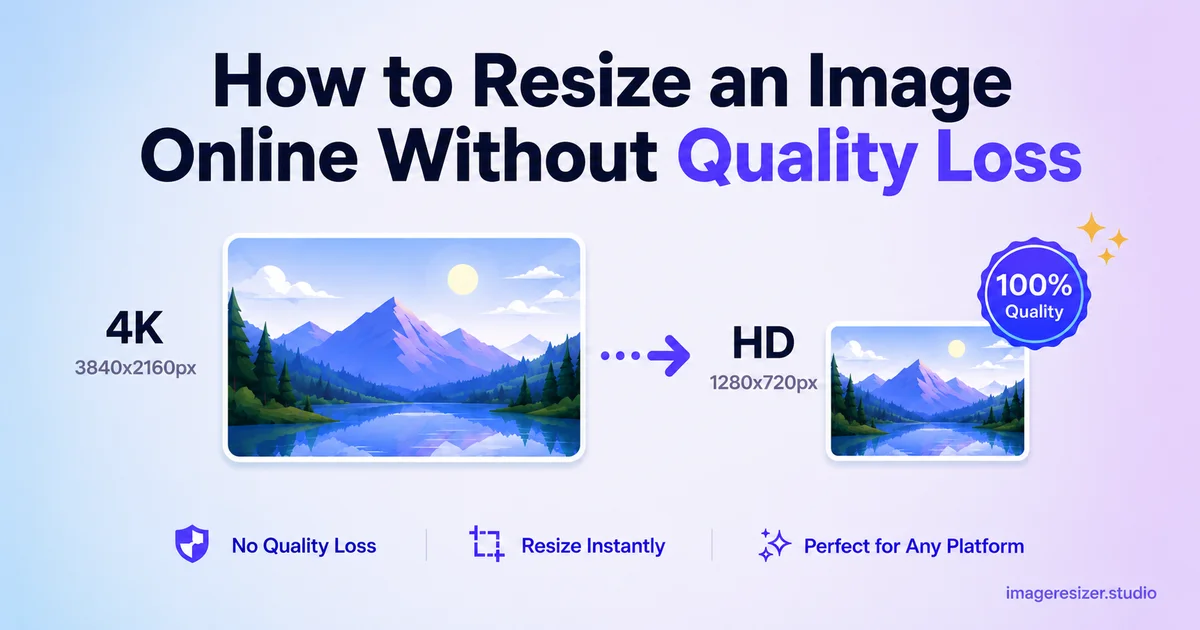
Resizing an image sounds simple. Drag a corner, click save, done. But the moment you do that in a basic editor, the picture gets soft, the text inside blurs, and the colors look off. You shrink a sharp image and end up with something that looks like a screenshot of a screenshot.
This guide fixes that.
You'll learn how to resize any image online while keeping it sharp, what's actually happening when you reduce dimensions, which formats hold up best, and the specific settings that protect quality. I'll also show you the exact steps using a free tool you can open in your browser right now.
No software. No signup. No watermark.
What "resize without losing quality" actually means
Quick truth: every resize loses some quality. The pixels you remove are gone. The question is whether your eye can tell.
When you shrink an image, the software has to decide what to keep and what to throw away. A good resizer is doing math on every pixel, blending neighbors so edges stay crisp. A bad one just deletes rows of pixels and hopes for the best. That's why the same photo can look perfect after one tool and trash after another.
So when people say "no quality loss," they mean visually identical at the new size. You're not getting magic. You're getting smart math.
Three things decide how good your resized image looks:
- The resampling algorithm the tool uses (Lanczos and Bicubic are the gold standards)
- Whether the tool re-compresses the file after resizing
- How far you're shrinking it (going from 4000px to 1000px is fine, going from 1000px to 4000px is where things fall apart)
Most free online tools fail on point 2. They resize beautifully, then save your PNG as a low-quality JPEG to make the file smaller, and that's where the artifacts creep in.
When you actually need to resize an image
Before you touch anything, know why you're resizing. The right output depends on the destination.
Uploading to a website or blog
Target 1200px to 1920px on the long edge. Anything bigger slows your page down. Anything smaller looks pixelated on a retina screen.
Sending over email
Most providers cap attachments at 25 MB. Resize to 1600px on the long edge and save as JPEG. A 6 MB photo drops to under 500 KB without looking different in an email preview.
Posting on social media
Each platform has its own dimensions. Instagram square is 1080x1080. YouTube thumbnails are 1280x720. LinkedIn posts work best at 1200x627. If you upload the wrong size, the platform crops or resizes for you, and that's when quality drops the most.
Filling government or job forms
These usually demand a specific file size like "under 100 KB" or "between 20 KB and 50 KB" plus exact pixel dimensions. This is where most people get stuck. The form rejects the file 4 times in a row and you start considering a career change.
Printing
Different rules entirely. You don't shrink images for print, you make sure they have enough resolution. A 4x6 photo print needs roughly 1200x1800 pixels at 300 DPI. Shrink below that and the print looks soft.
The 4 things that destroy image quality when you resize
These are the silent killers. Avoid them and your resized images will look almost identical to the original.
1. Upscaling without AI
Making an image bigger than its original size is the fastest way to ruin it. The tool has to invent pixels that don't exist. Without AI upscaling, you get blur. Period.
Rule: only resize down, or use an actual AI upscaler if you need to go up.
2. Resizing JPEGs multiple times
JPEG is a lossy format. Every time you save a JPEG, it throws away some data to keep the file small. Resize the same JPEG 5 times and you'll see chunky blocks and weird color bands.
If you're going to resize an image more than once, always start from the original file. Don't keep resizing the resized version.
3. Aggressive compression after resizing
Some tools quietly compress your image to 60% quality after resizing. That's why your output looks worse than the input even though the dimensions are right. Look for a tool that lets you control the output quality or skips re-compression entirely.
4. Using the wrong format for the job
Saving a screenshot of text as JPEG turns the letters into a fuzzy mess. JPEG was built for photos with smooth color gradients, not sharp lines. Use PNG for graphics, screenshots, logos, and anything with text. Use JPEG for photographs.
WebP handles both decently and saves about 30% file size compared to JPEG. If your destination supports it, use WebP.
Want to try this right now? Open the free image resizer here → and follow along with your own photo. Works on phone, tablet, and desktop. No signup.
How to resize an image online: the actual steps
Here's the workflow that gives you a clean, sharp resized image every time. I'm using a free browser-based tool so you can do this from any device without installing anything.
Step 1: Pick your target dimensions or file size
Decide before you start. "I need this image at 800 pixels wide" or "I need this under 200 KB." If you don't know, check the destination's requirements first. Guessing is how you end up resizing the same photo 4 times.
Step 2: Upload your original file
Drag your photo into the resizer or click to browse. Use the highest quality version you have. If the file came off your phone, send it to yourself uncompressed (use "Mail Drop" on iPhone or share via Google Photos as "original quality").
Step 3: Choose your resize method
You'll usually see two options:
- By dimensions: enter the exact width and height in pixels
- By file size: enter your target in KB or MB and let the tool work backwards
If a form demands a specific KB, use file size mode. If a platform demands specific dimensions, use pixel mode.
Step 4: Lock the aspect ratio
This is the one setting people skip and regret. If aspect ratio is unlocked, the tool will stretch or squish your image to fit whatever you typed. Faces get wider. Logos lean. Always keep this on unless you have a very specific reason to distort the image.
Step 5: Pick the output format
JPEG for photos. PNG for screenshots, logos, or anything with transparency. WebP if your destination supports it and you want the smallest file with the best quality.
Step 6: Check the quality slider
If the tool gives you a quality option, 80 to 90 is the sweet spot for JPEG. Below 70 and you'll see artifacts. At 100 the file gets unnecessarily large with no visible improvement. PNG quality usually isn't adjustable because PNG is lossless.
Step 7: Download and verify
Open the downloaded file before you submit it anywhere. Zoom in. Check the edges of text and faces. If it looks clean, you're done. If you spot fuzziness, go back and bump the quality up or try a different format.
Resize by pixels vs file size: which one do you need?
These are two completely different jobs and people mix them up constantly.
Resize by pixels
You're controlling the dimensions of the image. Width and height in pixels. Use this when a platform says "image must be 1200x800" or when you know exactly how big the image needs to appear on screen.
Result: file size will be whatever it turns out to be. Could be 200 KB. Could be 2 MB. The tool doesn't care.
Resize by file size
You're controlling how many KB or MB the file uses on disk. Use this for forms, attachments, or any system with a hard upload limit.
Result: dimensions adjust automatically. The tool figures out how much to shrink the image and how much to compress it to hit your target size.
If you need both ("image must be 800x600 AND under 100 KB"), do it in two passes. First resize to dimensions. Then run the result through a compressor to hit the file size.
Which format keeps the most quality after resizing?
Format matters more than most people realize. Here's the short version:
JPEG
Best for: photographs, scenes with lots of colors and gradients. Avoid for: text, logos, screenshots, images with sharp edges. Quality after resize: good at 85% quality or higher. Drops fast below 70%.
PNG
Best for: screenshots, logos, graphics, anything with transparency. Avoid for: large photographs (file sizes get huge). Quality after resize: essentially perfect. PNG is lossless so resizing doesn't add compression artifacts.
WebP
Best for: web use where you need small files and good quality. Avoid for: anything you're sending to someone on an older iPhone or older email client (it might not display). Quality after resize: 25 to 35% smaller than JPEG at the same visible quality.
AVIF
Best for: modern websites that prioritize page speed. Avoid for: anything that needs to work on iOS versions older than 16 or Windows machines without recent updates. Quality after resize: smaller than WebP, but support is still spotty in 2026.
Common resize jobs (and the exact settings to use)
Reference table. Bookmark this if you do these tasks regularly.
Passport photo upload
- Dimensions: 35x45mm (or 2x2 inches for US passport)
- Resolution: 300 DPI
- File size: usually 10 KB to 100 KB depending on the country
- Format: JPEG
LinkedIn profile photo
- Dimensions: 400x400 pixels minimum
- File size: under 8 MB
- Format: JPEG or PNG
Instagram post (square)
- Dimensions: 1080x1080 pixels
- File size: under 30 MB
- Format: JPEG
YouTube thumbnail
- Dimensions: 1280x720 pixels
- File size: under 2 MB
- Format: JPEG or PNG
Blog post hero image
- Dimensions: 1600x900 pixels (16:9) or 1200x800 (3:2)
- File size: under 200 KB for fast loading
- Format: WebP if supported, JPEG as fallback
Email attachment
- Dimensions: 1600px on the long edge is plenty
- File size: under 1 MB per image (total email under 25 MB)
- Format: JPEG
Resizing on your phone (no app required)
Most online resizers work in your phone browser just like they do on desktop. The trick is getting the original photo into the browser without your phone compressing it on the way.
On iPhone: when you tap the upload button and choose a photo from your library, iOS asks if you want to upload "Original" or a "Compressed" version on some sites. Pick original. If the option isn't there, AirDrop the photo to yourself first, then upload from Files.
On Android: same idea. Use the file picker to grab the original from your gallery folder. Some Android browsers compress automatically, so check the file size after upload.
Once the photo is in the tool, the resize works exactly the same way. Pick dimensions or file size, download, share.
Ready to resize your image? Try the free image resizer →. Works on any device, no signup, no watermark.
5 mistakes that quietly ruin your resized images
Even with a good tool, these will trip you up if you're not careful.
1. Resizing the same image multiple times
Every resize on a JPEG adds compression damage. Always go back to the original.
2. Saving a screenshot as JPEG
Text becomes fuzzy. Use PNG for any image with sharp edges or text.
3. Stretching to fit specific dimensions
If your photo is 4:3 and you force it into 16:9, it gets distorted. Crop first, then resize, or use a tool that pads the empty space instead of stretching.
4. Ignoring DPI for print
Online tools usually resize at 72 DPI (web standard). For print you need 300 DPI. The pixel count looks fine but the print comes out soft.
5. Trusting the file size estimate before download
Some tools show a preview file size that doesn't match the final download. Always check the downloaded file before submitting anywhere.
Frequently Asked Questions
Will resizing an image online lower its quality?
A small amount, yes. But with a good resizer that uses Lanczos or Bicubic resampling and doesn't aggressively re-compress, the loss is invisible to the human eye. The difference between a free online tool and Photoshop is honestly minimal for normal use cases.
Is it safe to upload my photos to an online image resizer?
Depends on the tool. The safest ones process your image entirely in your browser without uploading it to a server. Image Resizer Studio works this way: your photo never leaves your device, which means no privacy risk and no storage of your files anywhere.
What's the best free image resizer that doesn't add a watermark?
Most browser-based resizers don't add watermarks because they're not trying to upsell you to a paid version. Image Resizer Studio, Squoosh, and a few others process images locally and give you the file clean. Avoid any tool that asks you to pay to remove a watermark.
How do I resize an image to exactly 100 KB or 50 KB?
Use a resizer that supports target file size mode. You enter "100 KB" and the tool reduces dimensions and adjusts compression until the output matches. Trying to hit an exact file size by guessing dimensions manually is a frustrating game you'll lose.
Can I resize multiple images at once?
Yes, with a bulk resizer. You upload a folder or zip, set the resize rules once (like "resize all to 1200px wide and convert to JPEG at 85% quality"), and the tool processes everything. Useful for photographers, ecommerce sellers, and anyone with a batch of photos to prep for the web.
Wrapping up
Resizing an image online isn't complicated once you know the rules. Start from the original. Pick the right format for the job. Lock your aspect ratio. Don't over-compress. Check the downloaded file before you send it anywhere.
Do that and your resized images will look almost identical to the originals at a fraction of the file size.
If you want to skip the theory and just resize something, open the free image resizer here. Drop your photo in, set your target size, download. Takes about 15 seconds.